I'm keeping this one in drafts for a while, but I want a photo log about how I made my heldrake the way I did. Here's all of the steps I took and how I got from blue on blue with more blue, to the final product.
I started it off with a dark blue base, dry brushed a light blue and then ink washed a regular blue. It was just blue on blue on blue for the excuse of saying that I had at least three colors on it. Sure, they were all blue colors, but I had them on there.
From there I painted in all of the sections that I wanted to do the color blend on the bottom of the heldrake red. I wasn't quite sure how it was going to look, so I played it safe and did the bottom first.
I thought it didn't look too bad, so the top got the red treatment as well.
The tricky part about the color blend was that I was working on a blue base with a red on top of it, meaning that a strong yellow was near impossible. What I did to try to fight this was that before I even tried to start fighting the color blend, I lined in each cell half yellow and half red. This way I could come back and do a few layers of yellow on the yellow (typically by the time I got to the blend it was at least two or three layers) so it was strong enough.
Then came the hideous task of blending every single cell. I didn't worry about going over the lines too much, but I will never ever do this ever again.
Slowly but surely I worked my way through each wing, and remember this is just the underside.
It's slowly progressing, bottom right wings are shaded, others are not.
Once I got an entire side done I went back over it with blue to clean up all of the painting over the lines and to really exaggerate the cells. This one simple thing made each cell pop a lot more than I was expecting and it almost made me question a further step down the path where I do the metals.
Finally both sides of the bottom got done.
With the piece half done with color blends, it was time to tackle the top. The same thing happened. Each cell was first 50/50 red and yellow and then I went in and color blended each one into a red to yellow gradient.
This is the one where I really realized just how much the blue lines made a difference. You can see that the top picture isn't bad, but as soon as each cell gets outlined in the second picture, things look significantly better.
That got me to this point. The only thing I needed to tackle was the face, with some REALLY small cells, so I went out, got a new detail brush and tackled those.
After that it was time for the silver to come in. Top, bottom, everywhere I could get it that made sense to me. Officially it was supposed to be a light blue silver color, but I could never see the blue in the silver.
To get a blue tone to the silver I washed it in a blue wash/glaze, I don't know, just regular paint watered down a whole bunch. You can see it in the next pictures. In the first picture there's only the blue wash on the top wing, and then in the second one you can see just what that blue wash does to everything else. It finally gets that hint that the silver isn't silver, but some sort of blue metal.
With that done I did some edge highlights, and then based it.
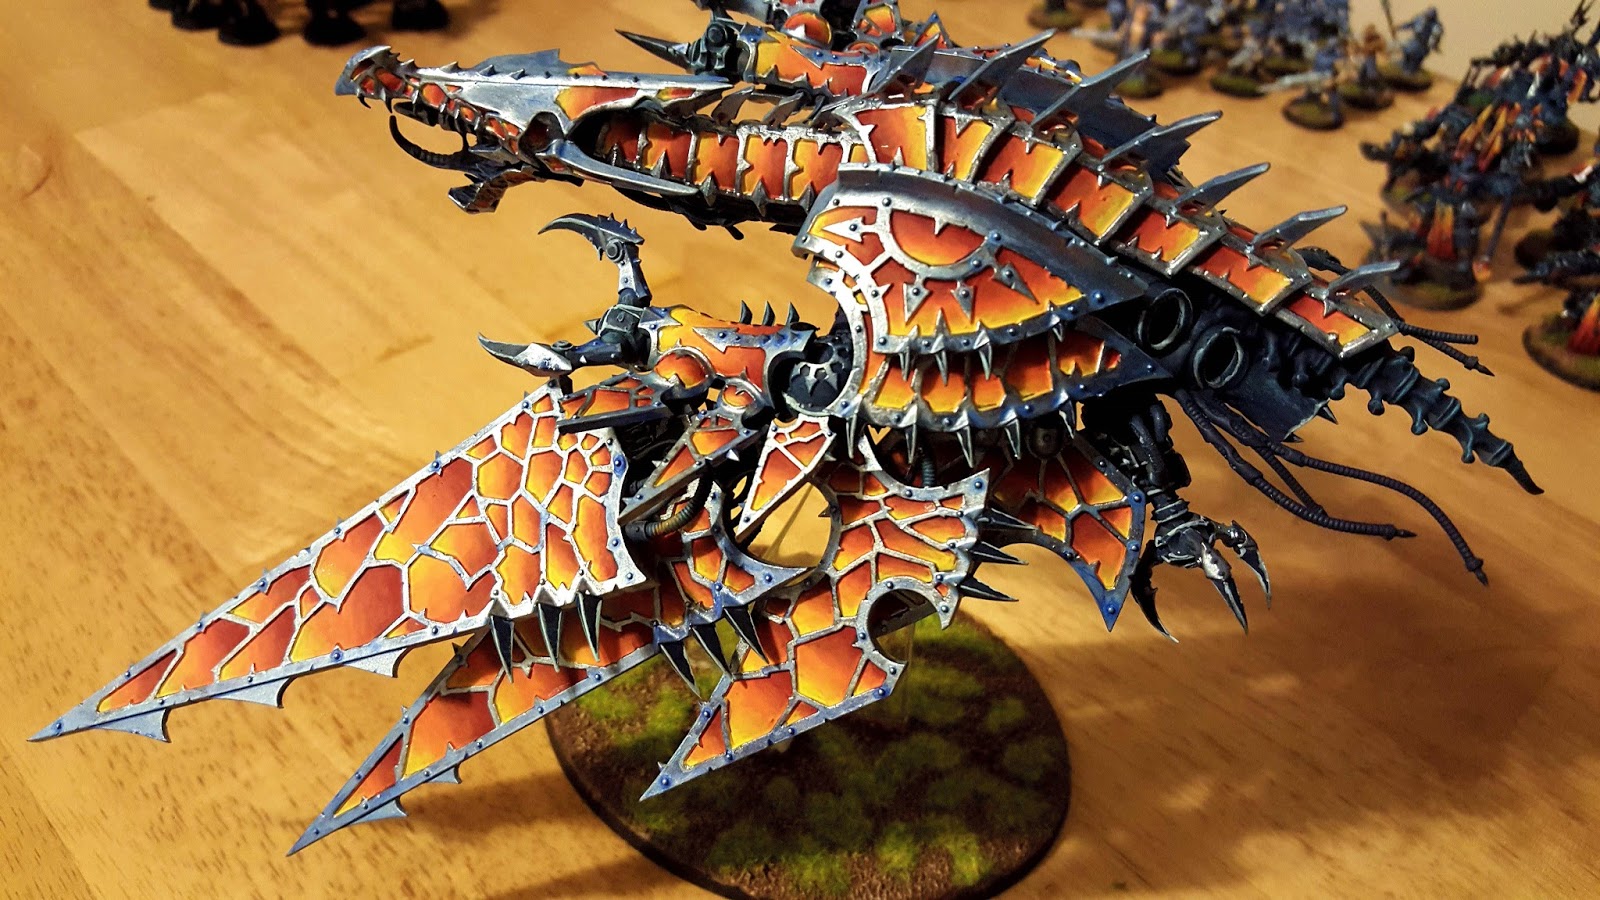
And here's my happy little Thousand Sons Heldrake with the rest of his army.
The best part about all of this, the ROUGH math behind all of this is that I started late November painting the marines, and have slowly been working through this army to now (which is the start of June). I do have two rhinos, that are just blue boxes (exact same paint job as the heldrake before any of this started), but I now have a fully painted, 40k Thousand Sons army. They are all the same color scheme, all of them are based, and all of them were done by me. In 6 months, I have made my 1850 points of an army, and I'm going to go out on a limb and say they look pretty good.
And now that I have this rediculously sexy army. . . it's time to sleep.


No comments:
Post a Comment